

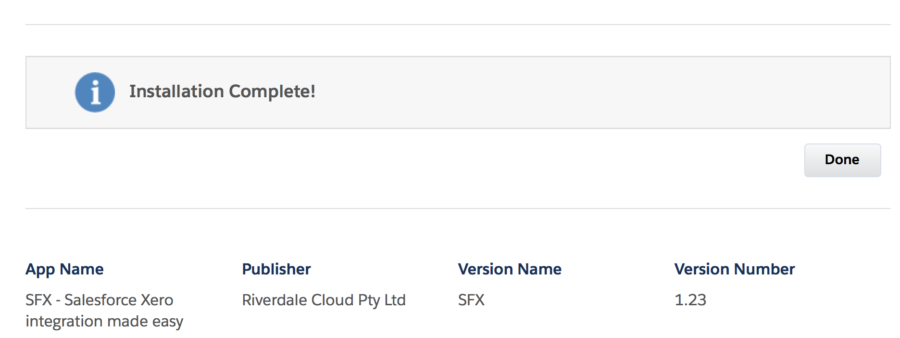

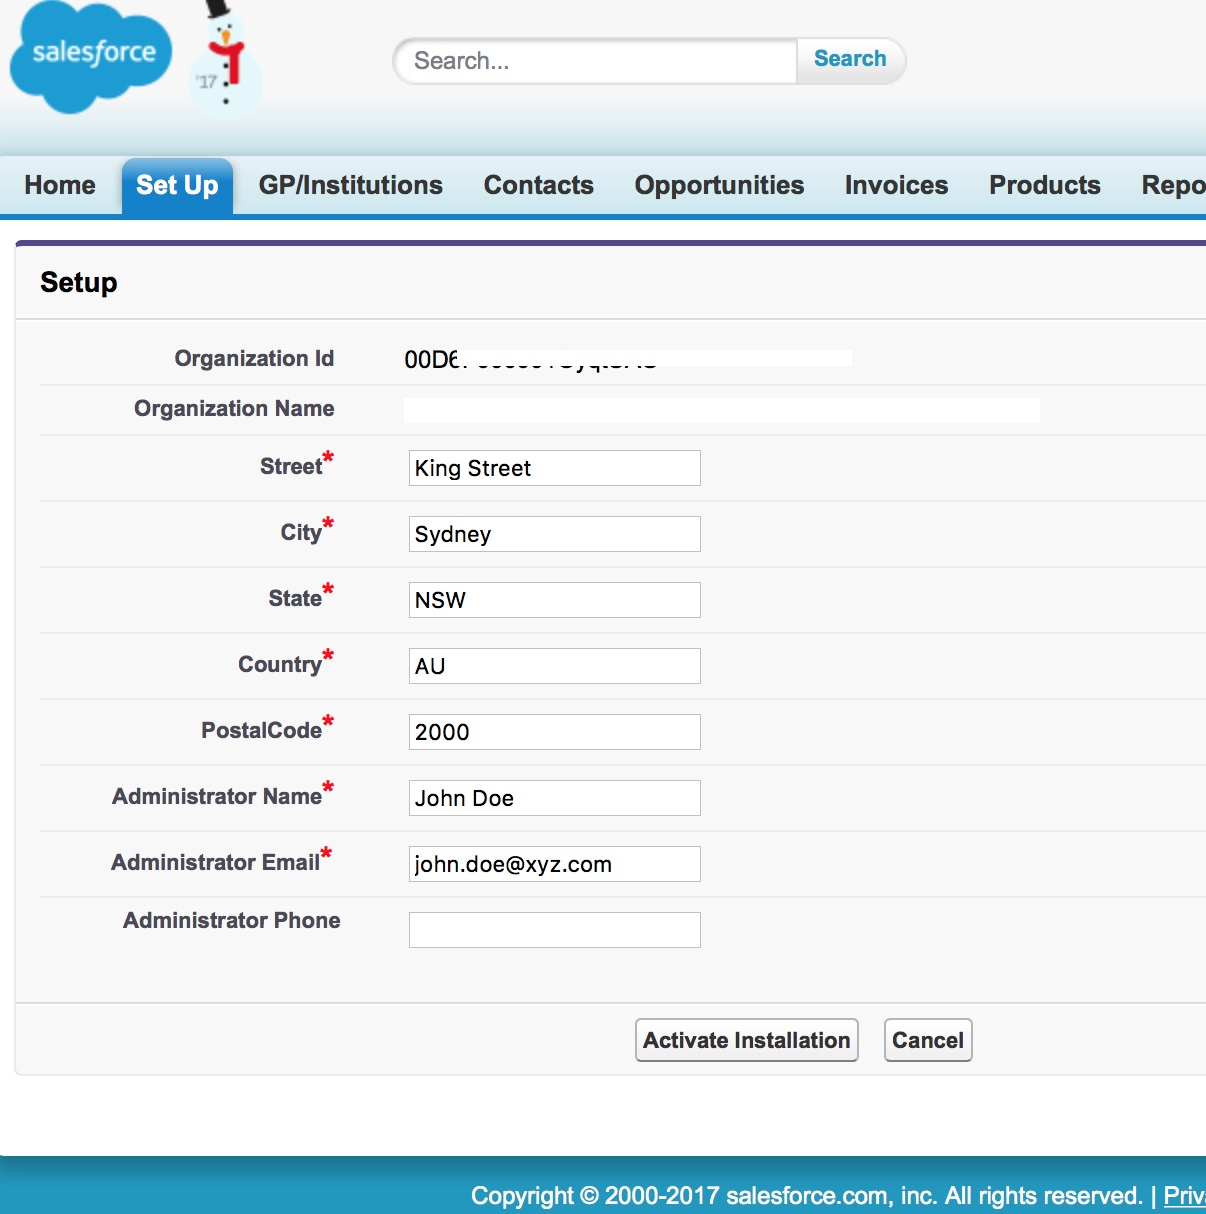
SFX is now activated

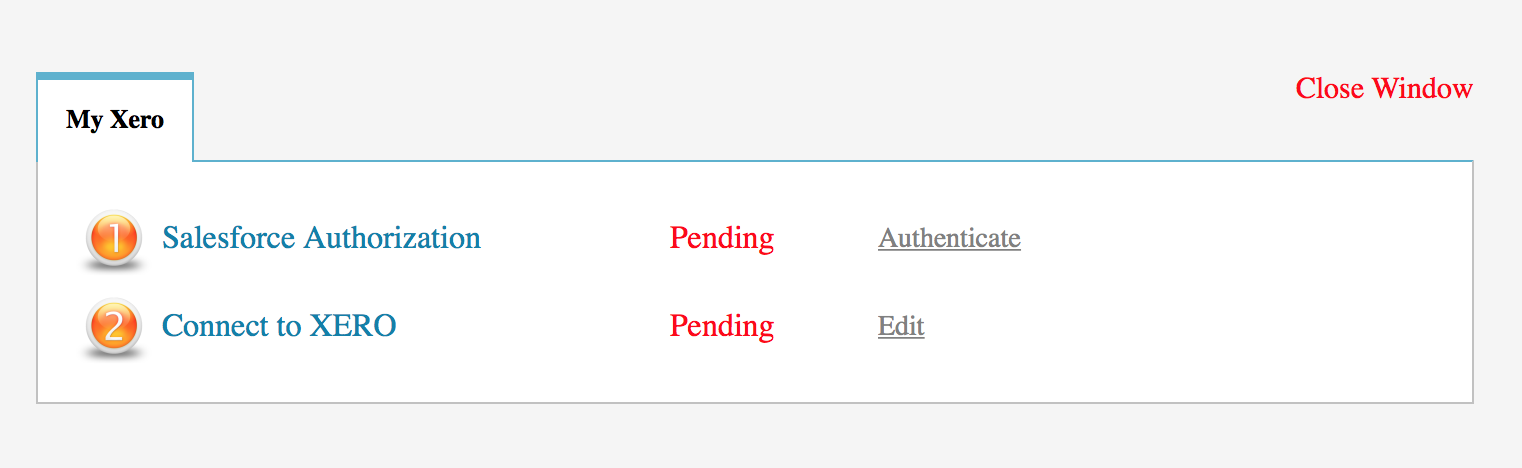
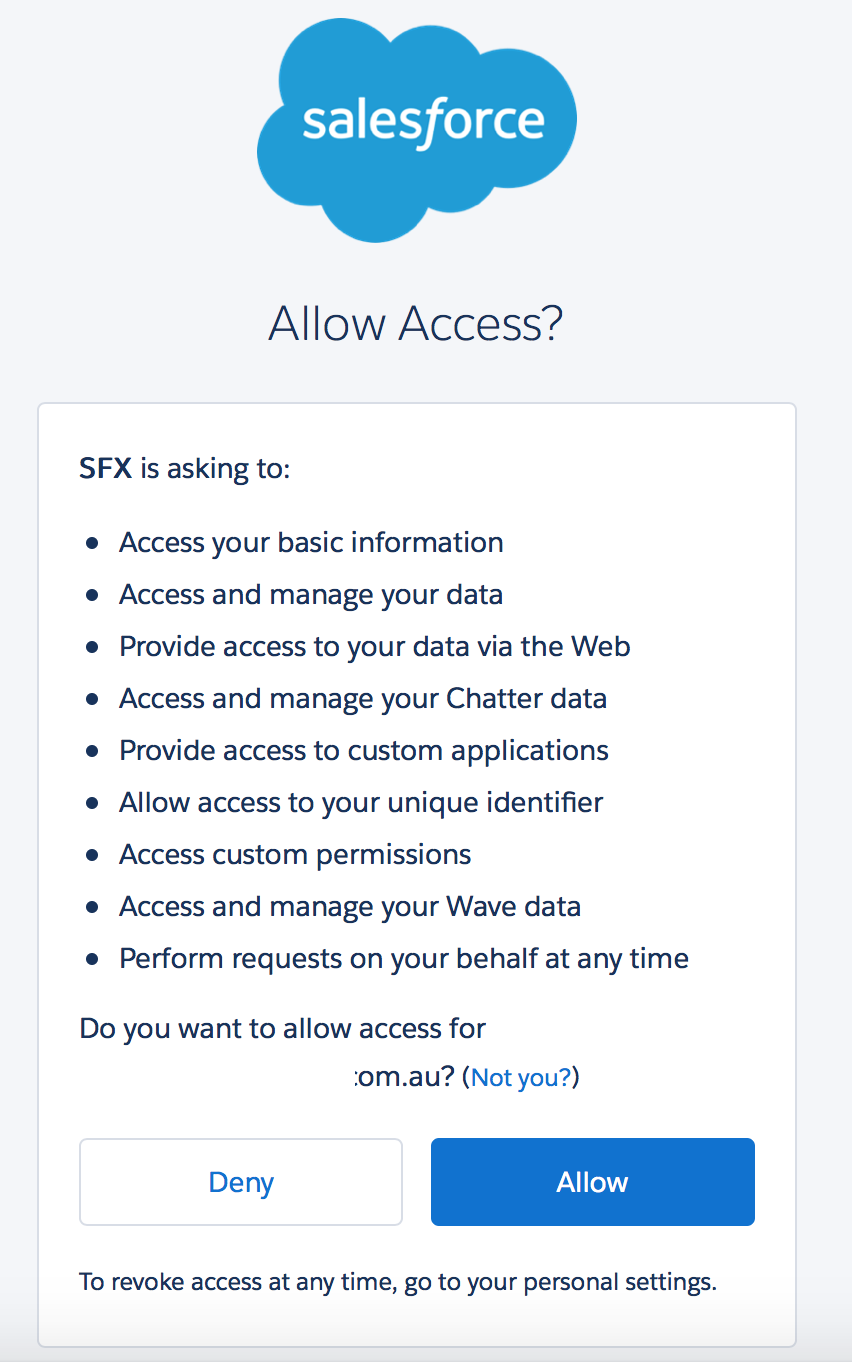
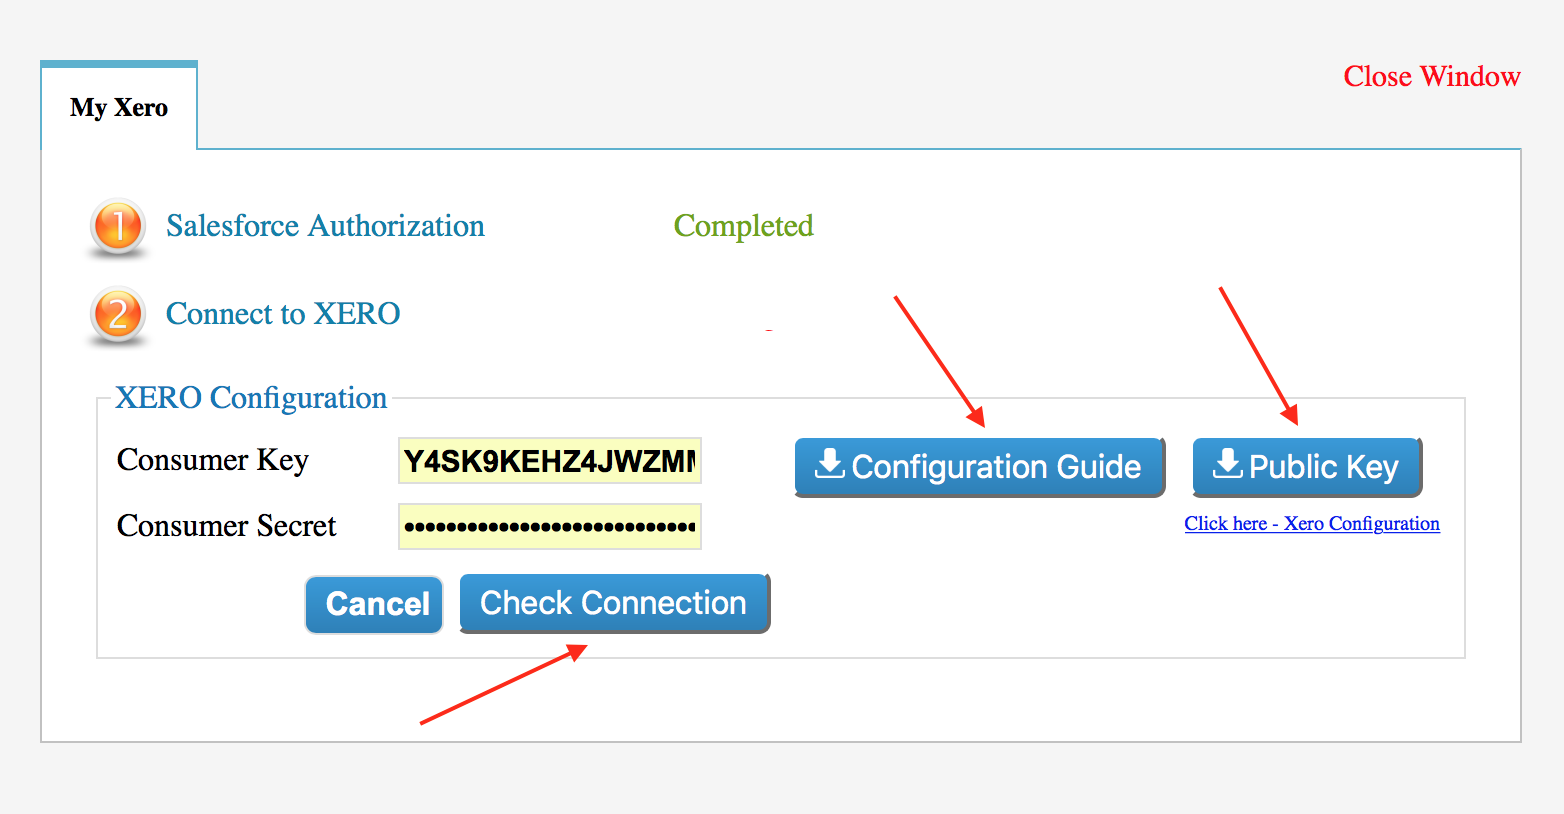
Click on Authenticate for authorizing the Salesforce connection with SFX connector, followed by clicking on “Allow Access”
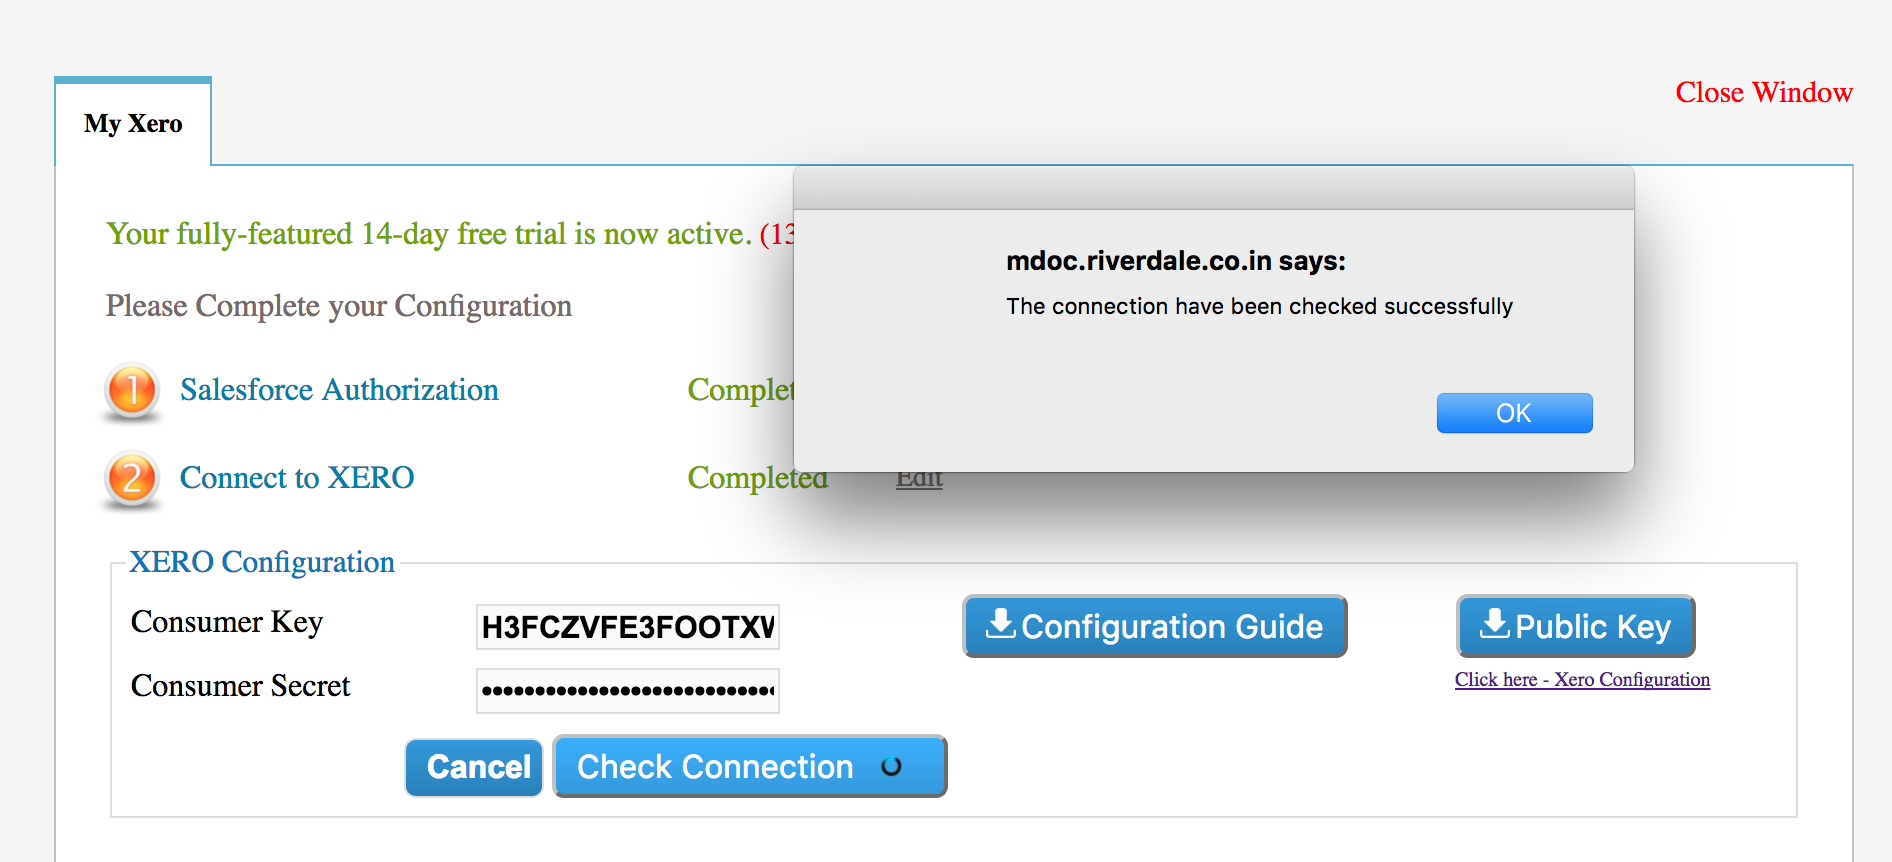
Upon connection, successful message is displayed.
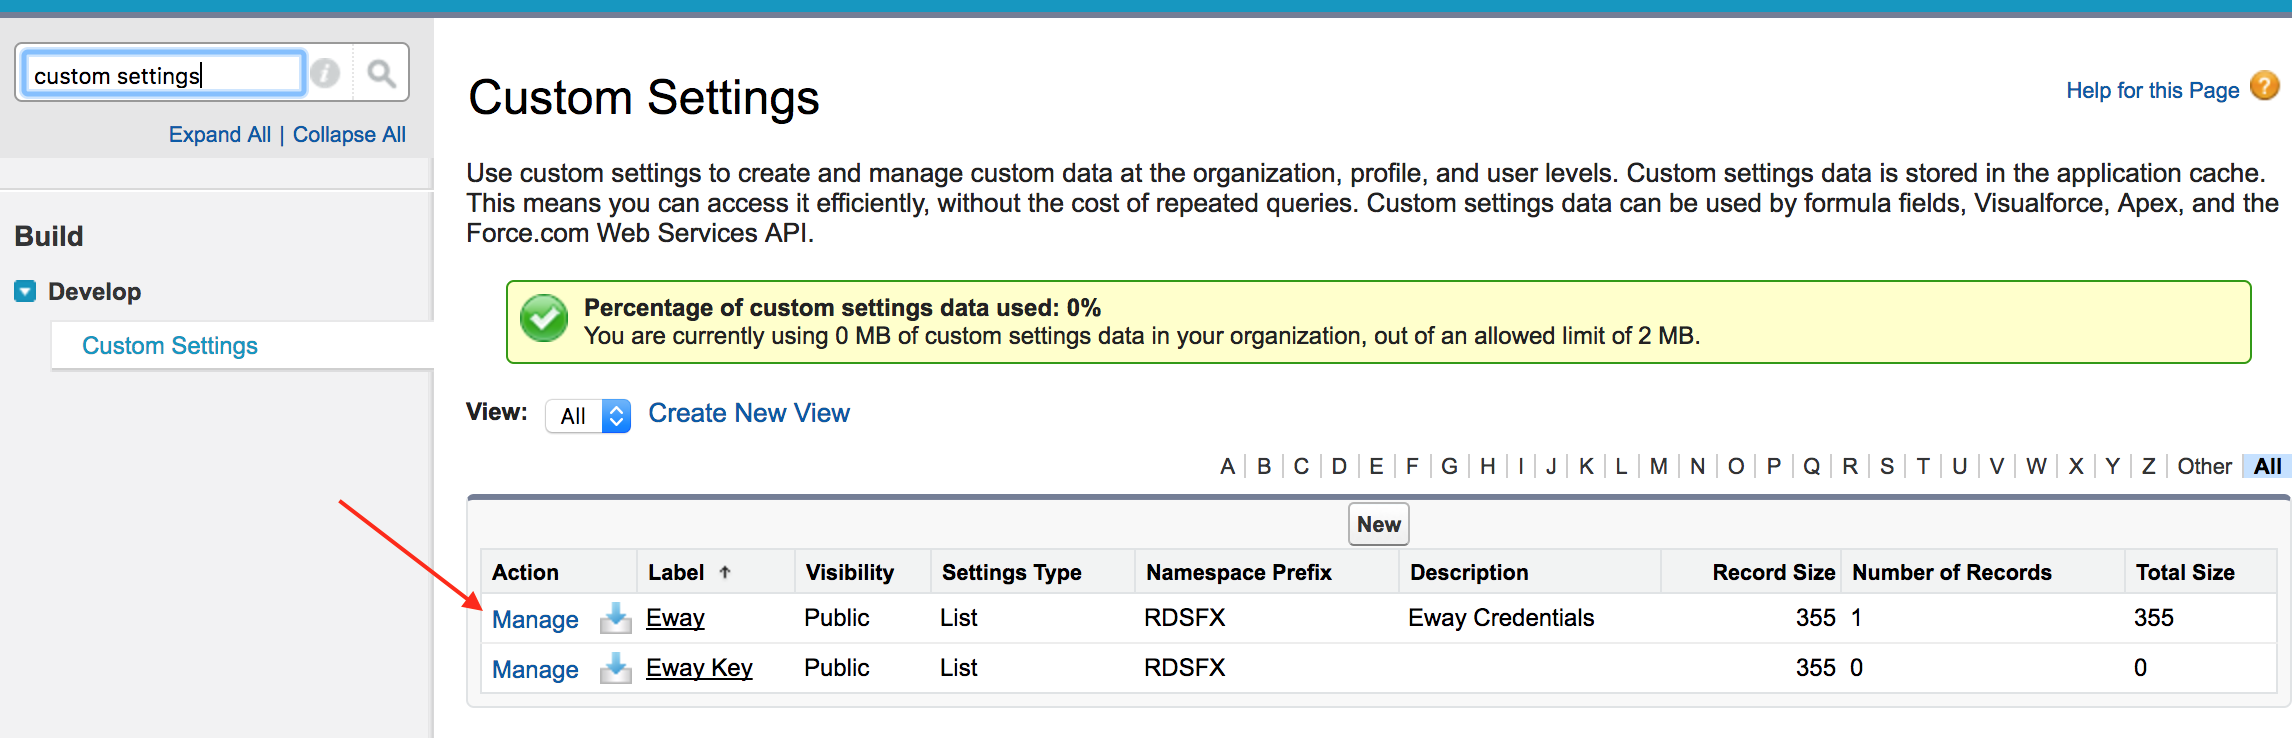
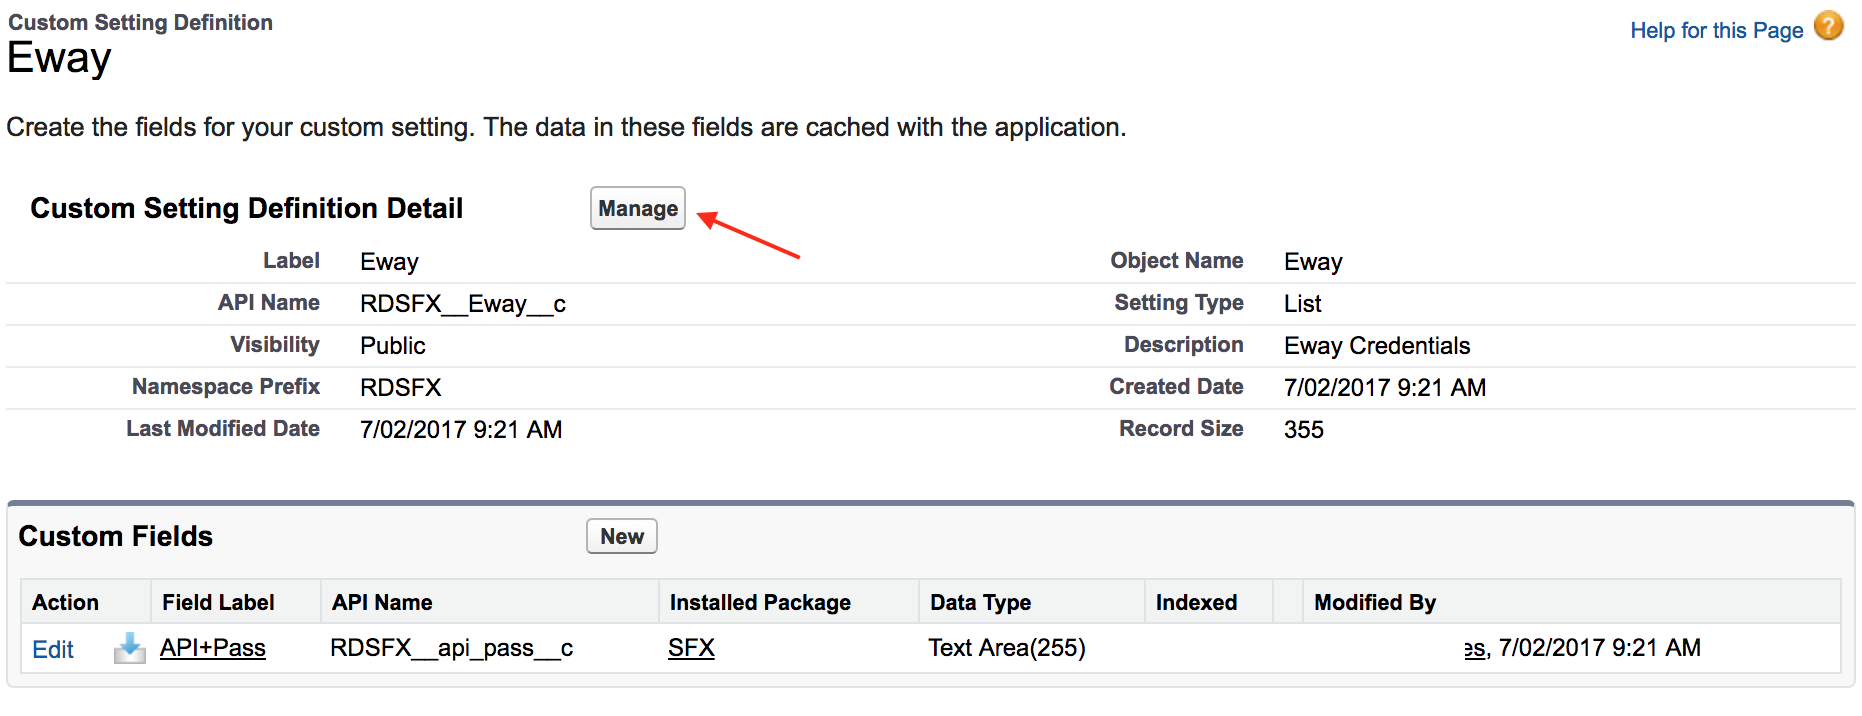

Click on Manage to enter Ewaykeydata for Eway Key
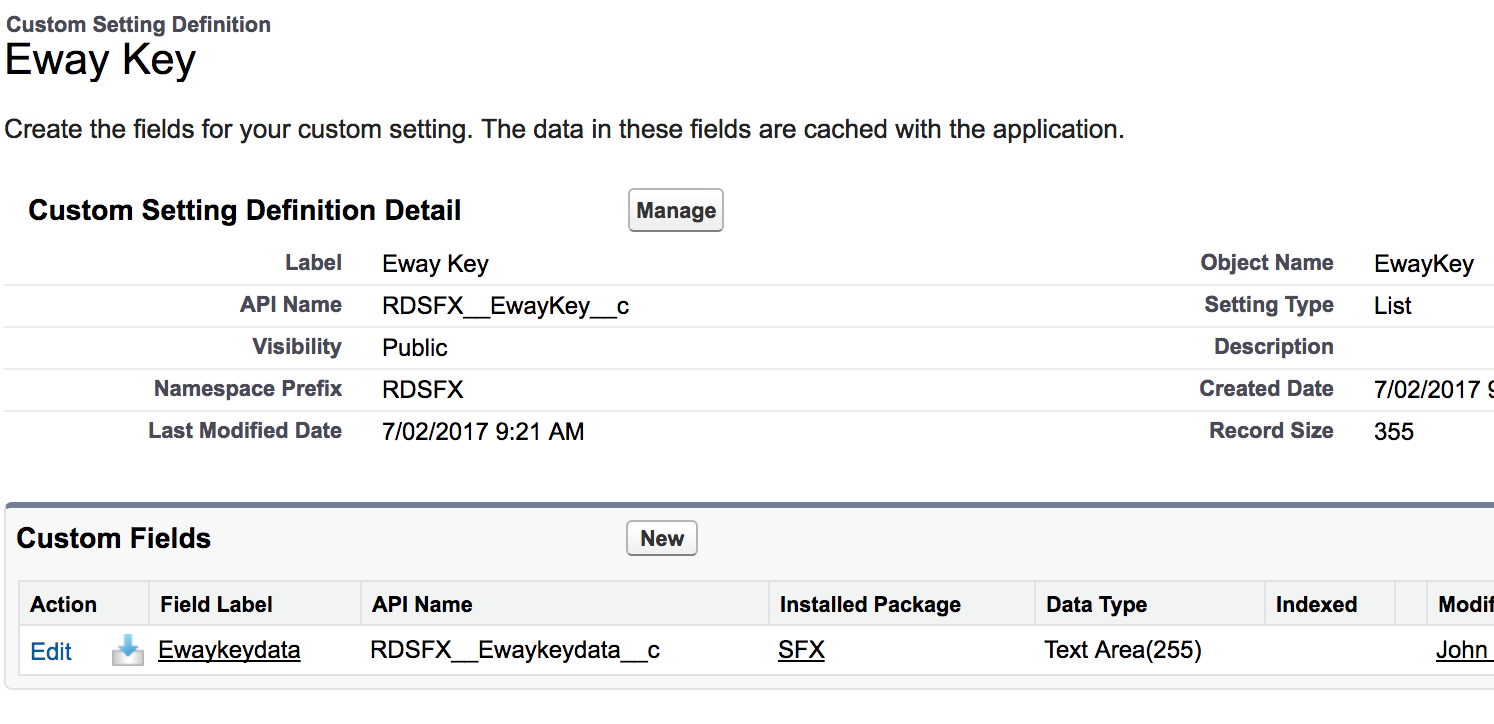
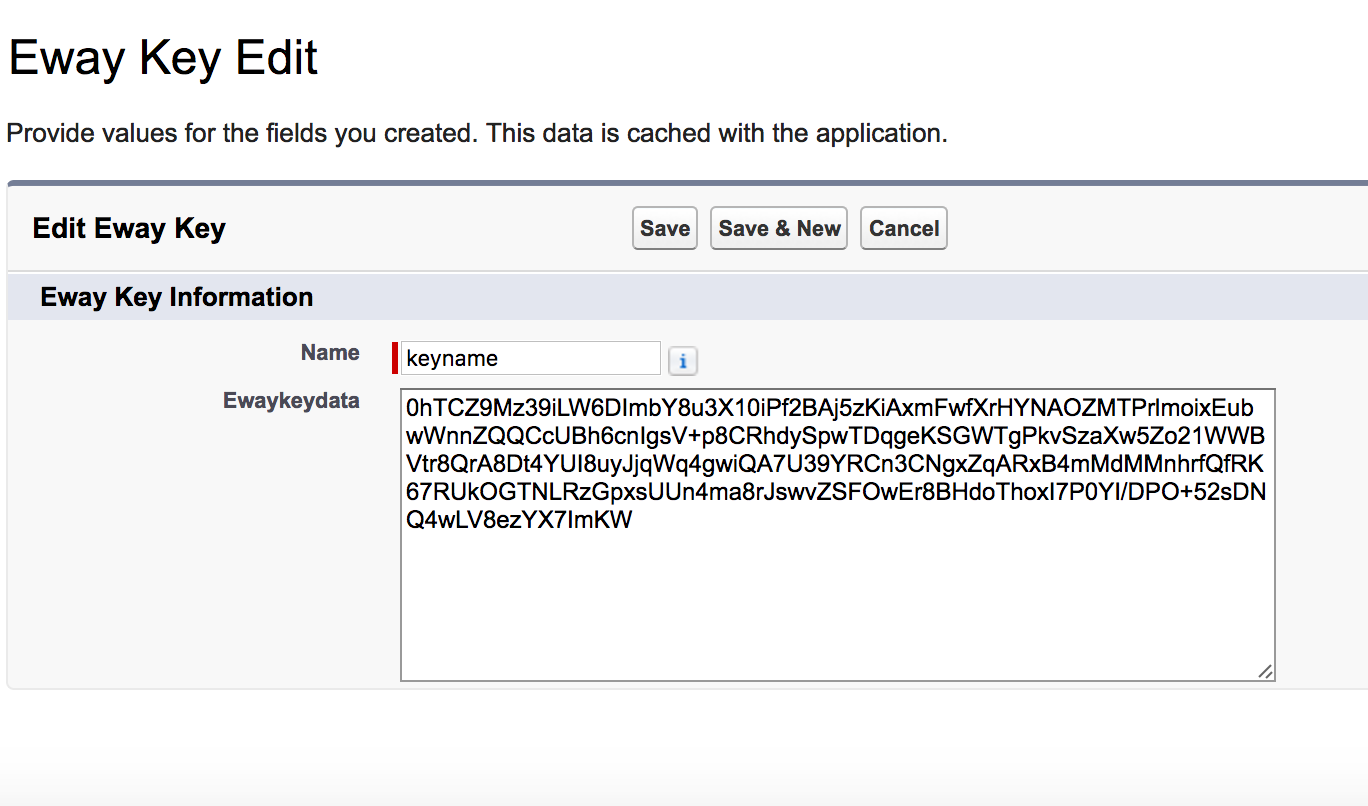
Enter the Ewaykeydata – Please note to copy and paste as-is the Name and Ewaykeydata as given below:
Name should be “keyname”
Ewaykeydata should be
0hTCZ9Mz39iLW6DImbY8u3X10iPf2BAj5zKiAxmFwfXrHYNAOZMTPrlmoixEubwWnnZQQCcUBh6cnIgsV+p8CRhdySpwTDqgeKSGWTgPkvSzaXw5Zo21WWBVtr8QrA8Dt4YUI8uyJjqWq4gwiQA7U39YRCn3CNgxZqARxB4mMdMMnhrfQfRK67RUkOGTNLRzGpxsUUn4ma8rJswvZSFOwEr8BHdoThoxI7P0YI/DPO+52sDNQ4wLV8ezYX7ImKW
Add another record and update the fields Name and Ewaykeydata with following: (Please note to copy and paste as-is)
Name should be “keyname2”
Ewaykeydata should be
xHDLRhzo5EL5RFC5pPB9SUUf2SAD9YMwx1/5x+MDD
xY1E8HcrSqBYuIaxUdJg+KfMOQH6XhYpaz6MbOLu8ZH0bw==

There are two options to add products to the Invoice; you could either add any product, which are not related to the opportunity line items or just Click on the button “Copy Opportunity line items”. This will copy all the products added to the related opportunity.
Note: Remember to select the correct Tax rate as defined in Xero
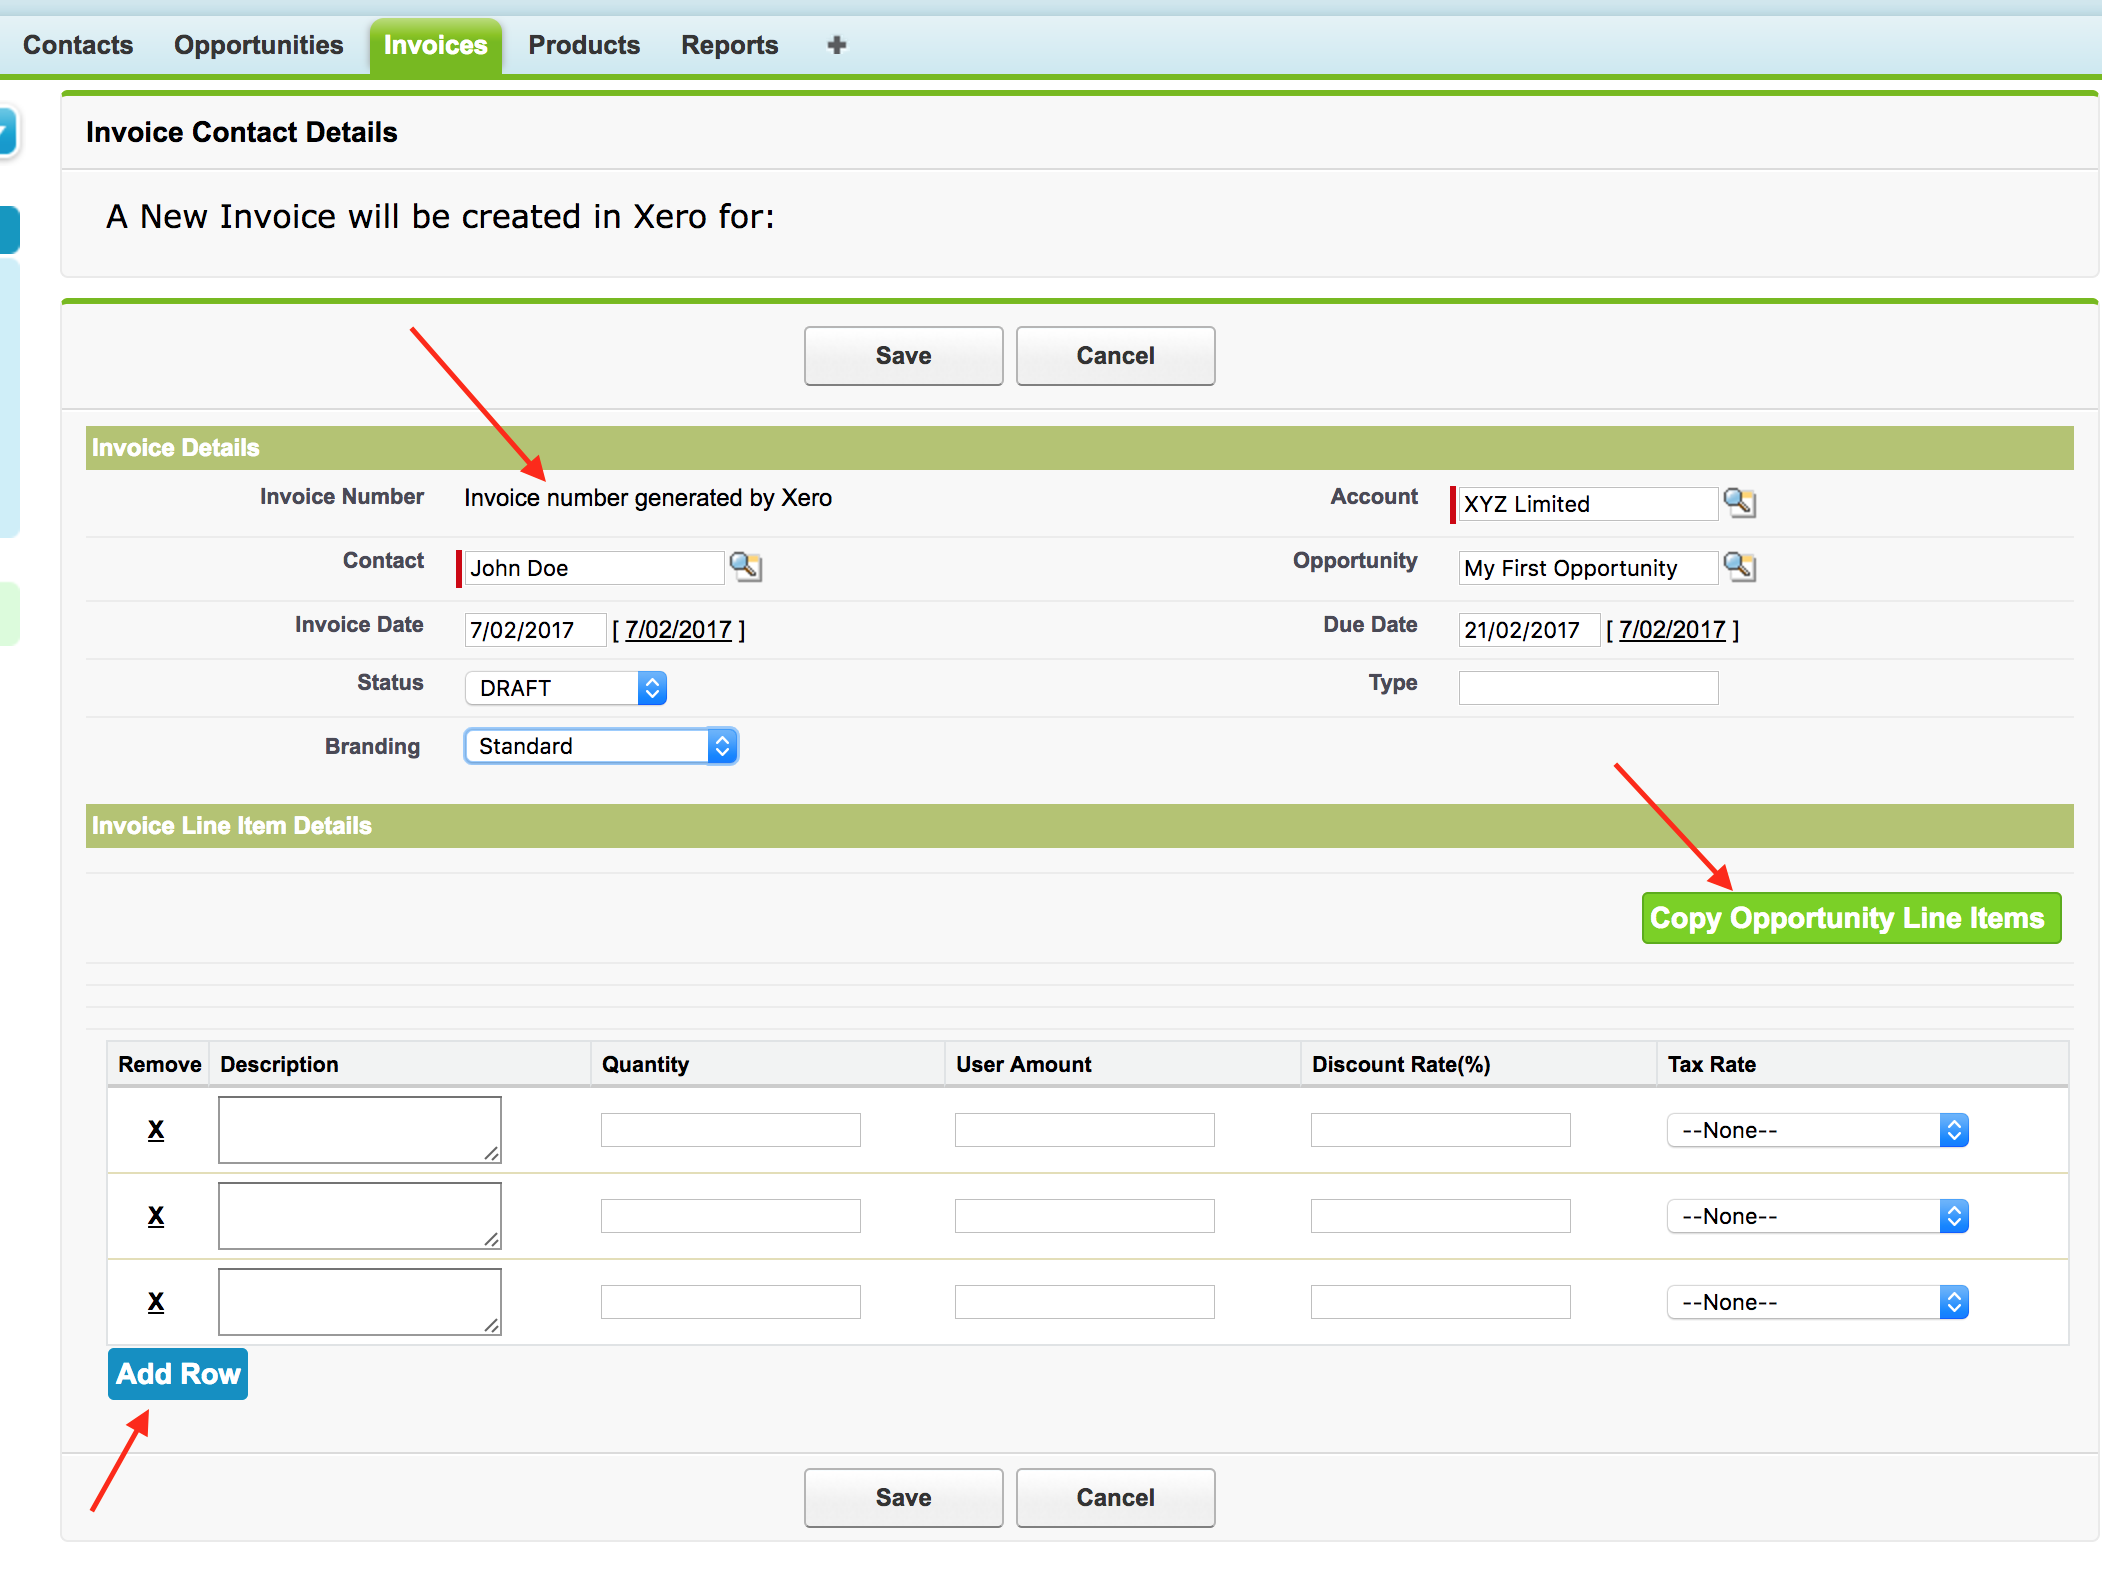
Invoice is generated and the same invoice is created instantly in Xero with the same invoice number.

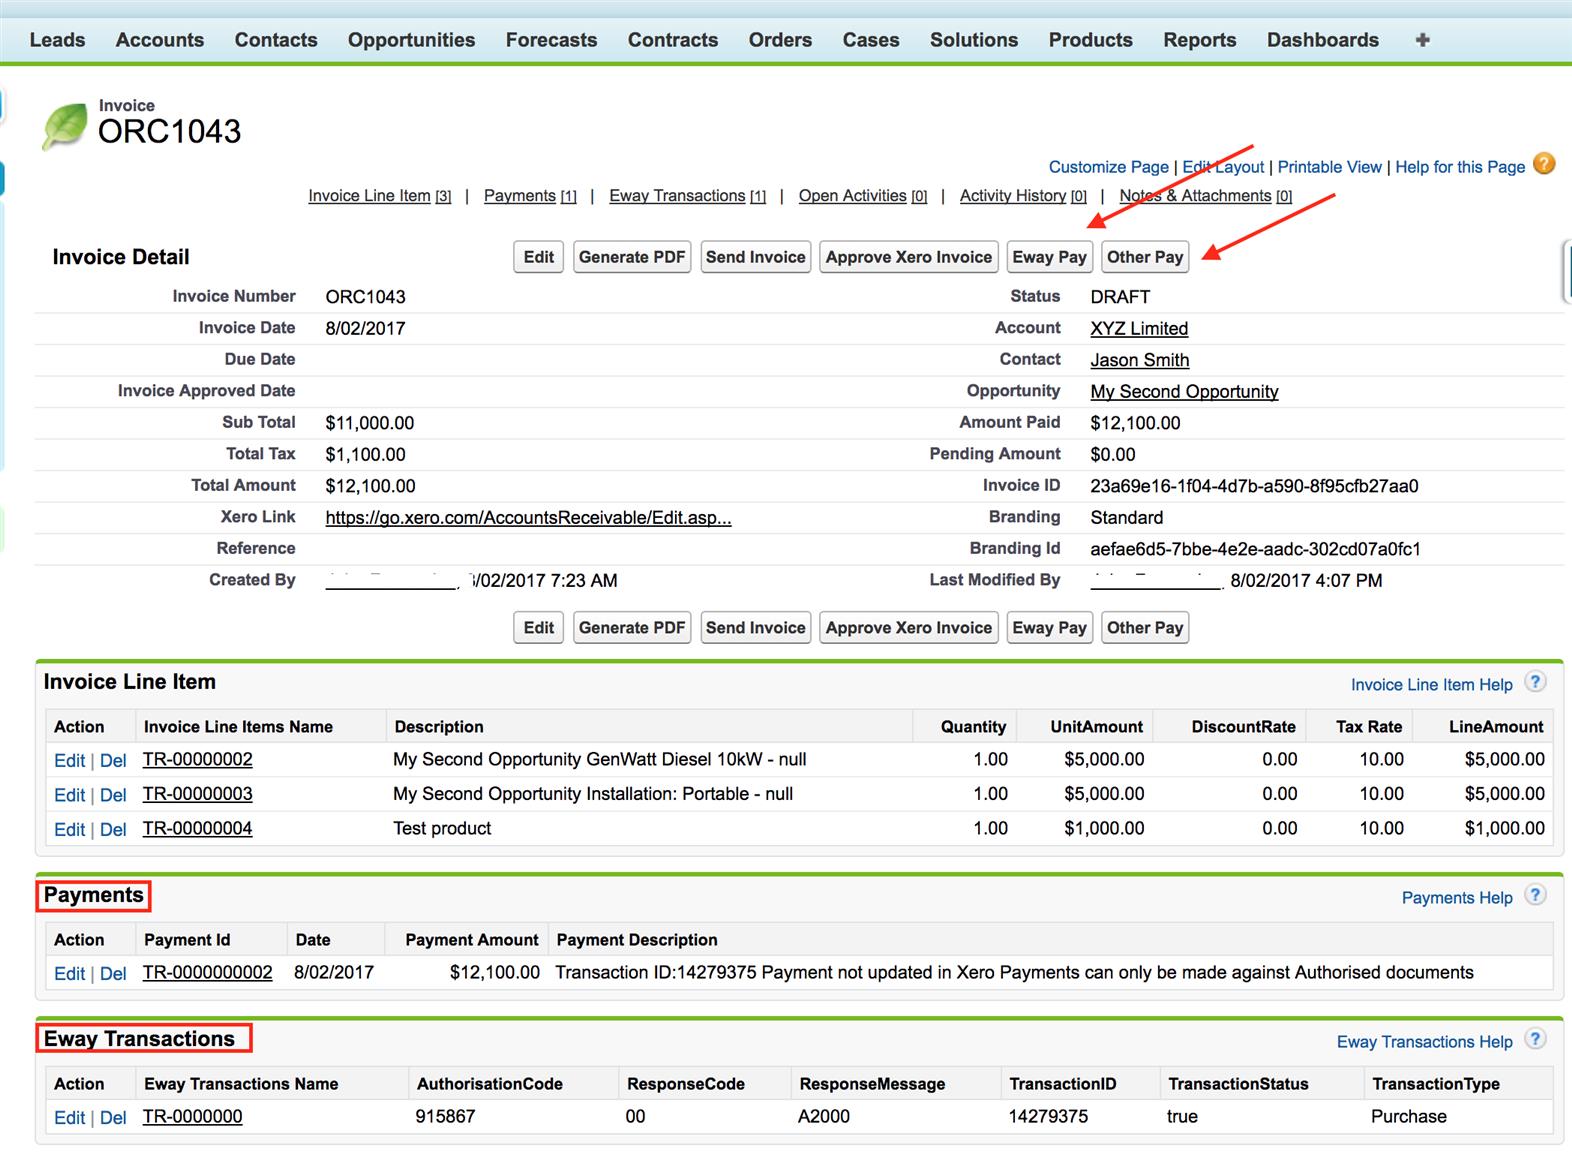
Features on Invoice Detail page:
a. Generate PDF: A pdf format Invoice is generated for printing purpose, stored under notes and attachment’s
b. Send Invoice: Email the Invoice to the selected contact, upon generating PDF. History captured under activity history.
c. Approve Xero Invoice: Enable to approve the Invoice, this changes the status of the invoice to Approved both in Salesforce and Xero. Note: Once this is done, you will be unable to edit/modify the approved invoice in XERO
d. eWay PAY: This button will enable to take instant credit card payments
Alternately related list on the Invoice object will enable you to record any Bank related transactions.

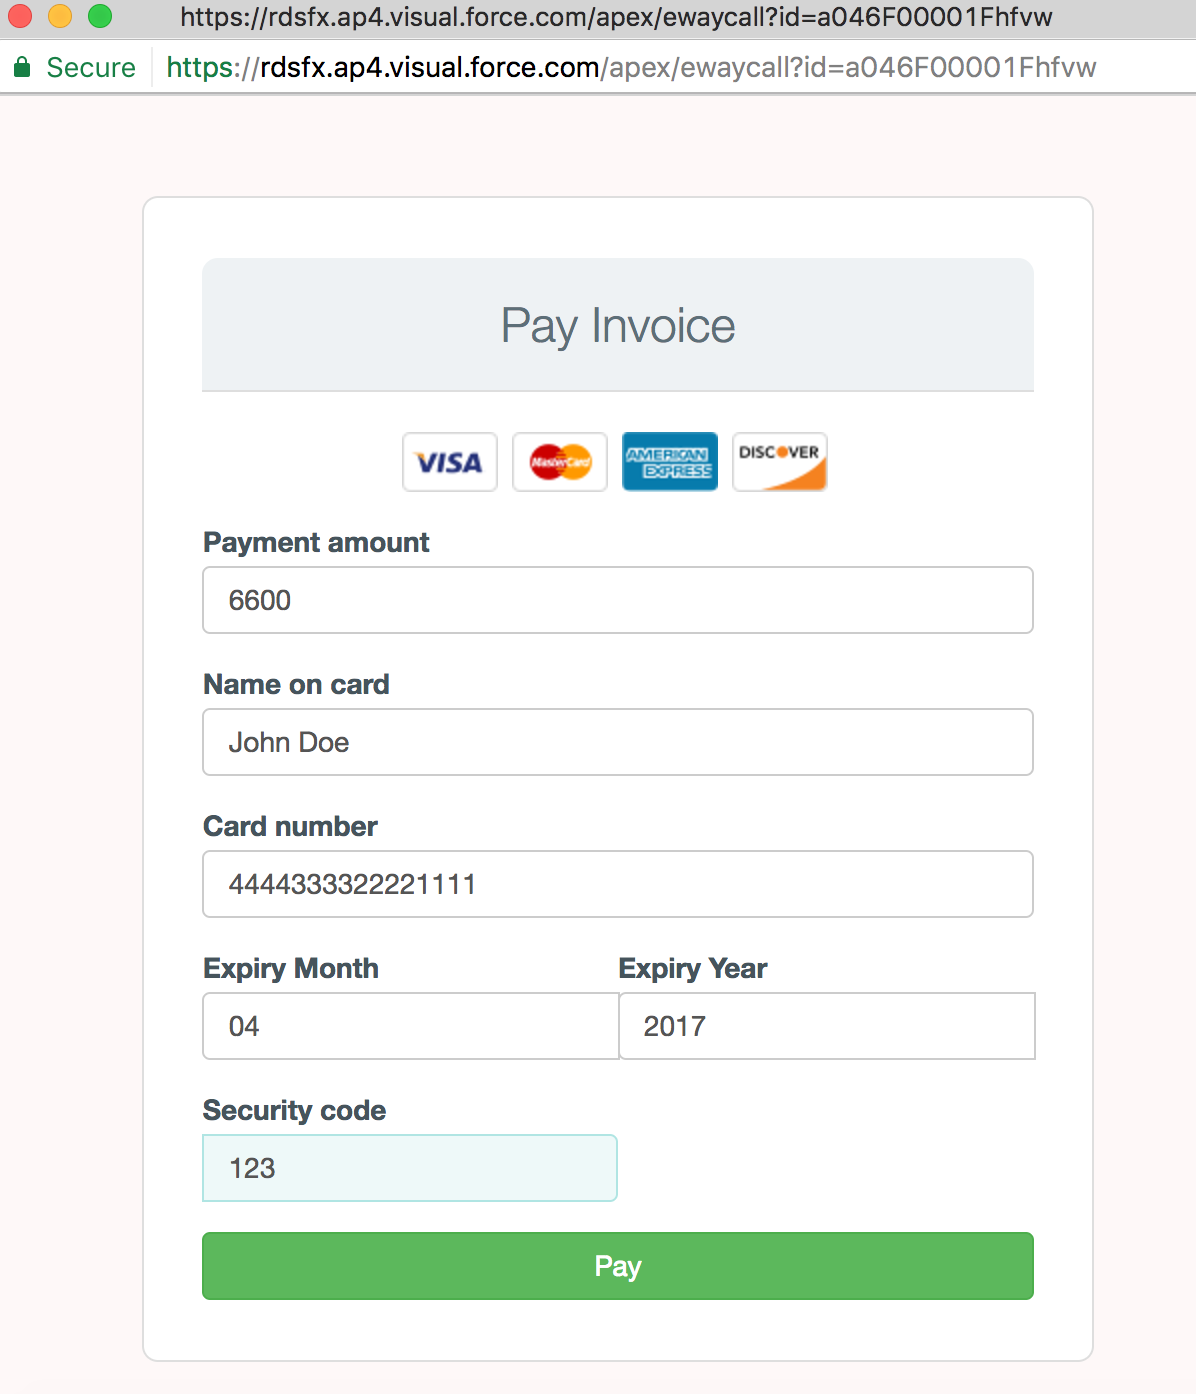
Payments are processed by eWay and transaction detail updated back to Salesforce Invoice under eWay Transactions.
On successful transaction payment detail is updated to Xero.
Card details are managed by eWay, no details are stored in Salesforce.

Upon successful payment, Transaction details are updated under Payments and eWay Transactions related list.
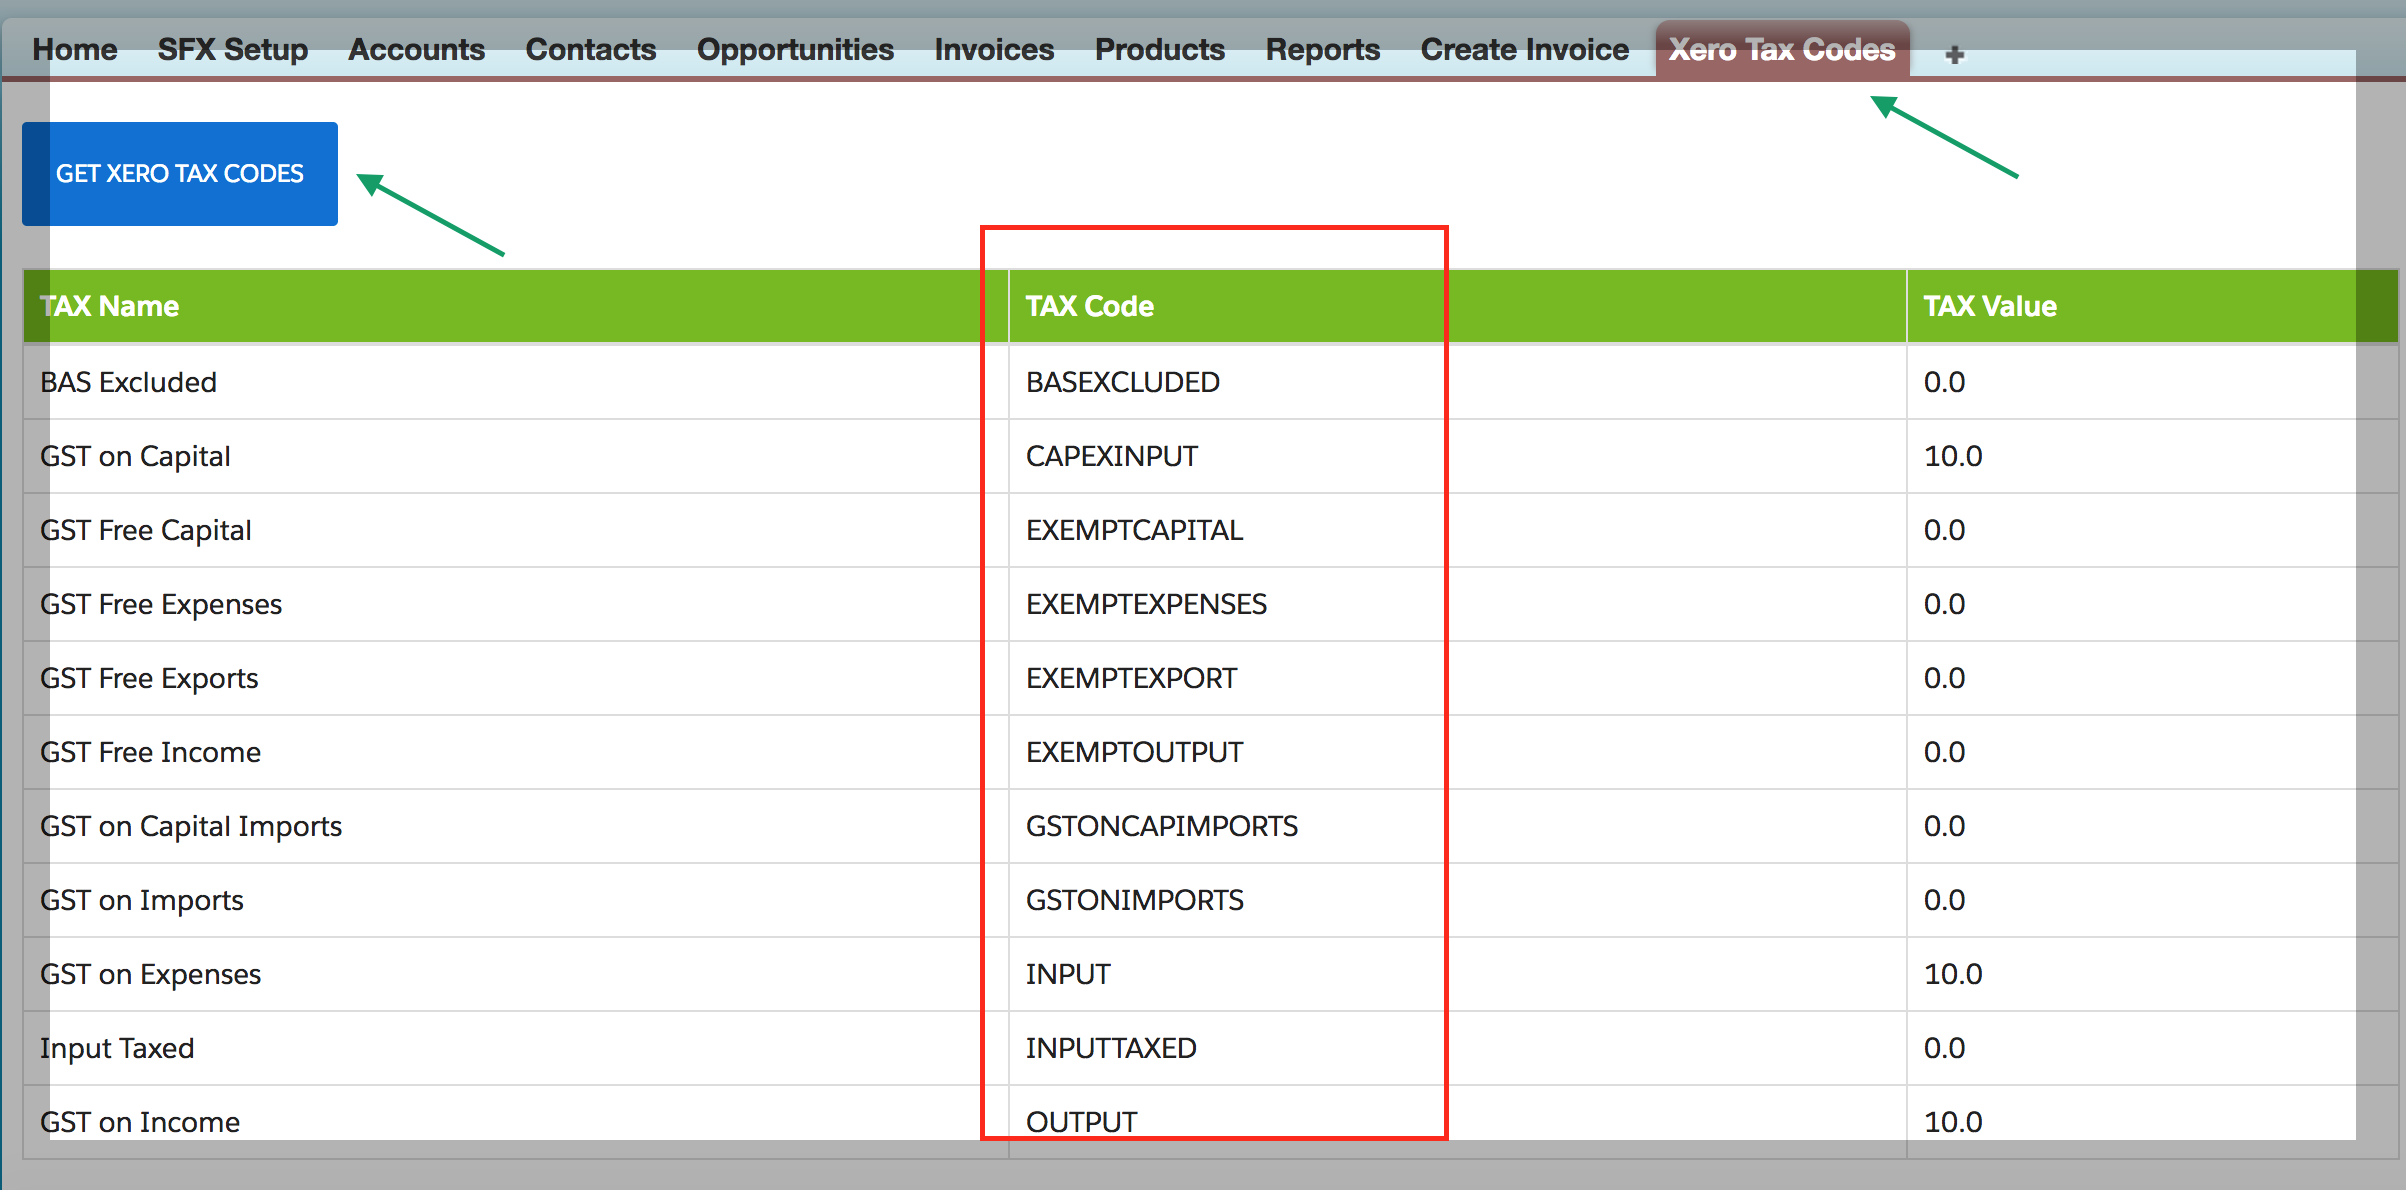
Update these<Xero Tax Codes>values highlighted in the image to<Opportunity Products>object custom field<Xero Tax Code>picklist.
For Branding click on<Get Xero Branding Theme Id>

Update the custom field of Opportunity object. The values should be the “Branding Theme Name” in this example the value is “Standard”
Auto Invoice Creation using Process Builder
Invoice auto creation and updating is based on the opportunity create, edit and condition mentioned in Process builder.
Conditions are based on use cases such as Opportunity Stage = “Closed won” or as required by the business.
Following configuration is for an example where Opportunity Stage = “Closed won” and is applicable in two different scenarios.
Scenario 1: New Invoice Creation
Invoice auto-creation is based on creating of new opportunity, condition being Opportunity Stage = “Closed won”
Scenario 2: Edit Opportunity line item (for an opportunity with existing Invoice)
In a scenario where the opportunity line items have to be modified, the Invoice is auto updated, only upon editing the opportunity
To setup a Process Builder, click on and search for “Process Builder” in the quick find box found on the left panel.
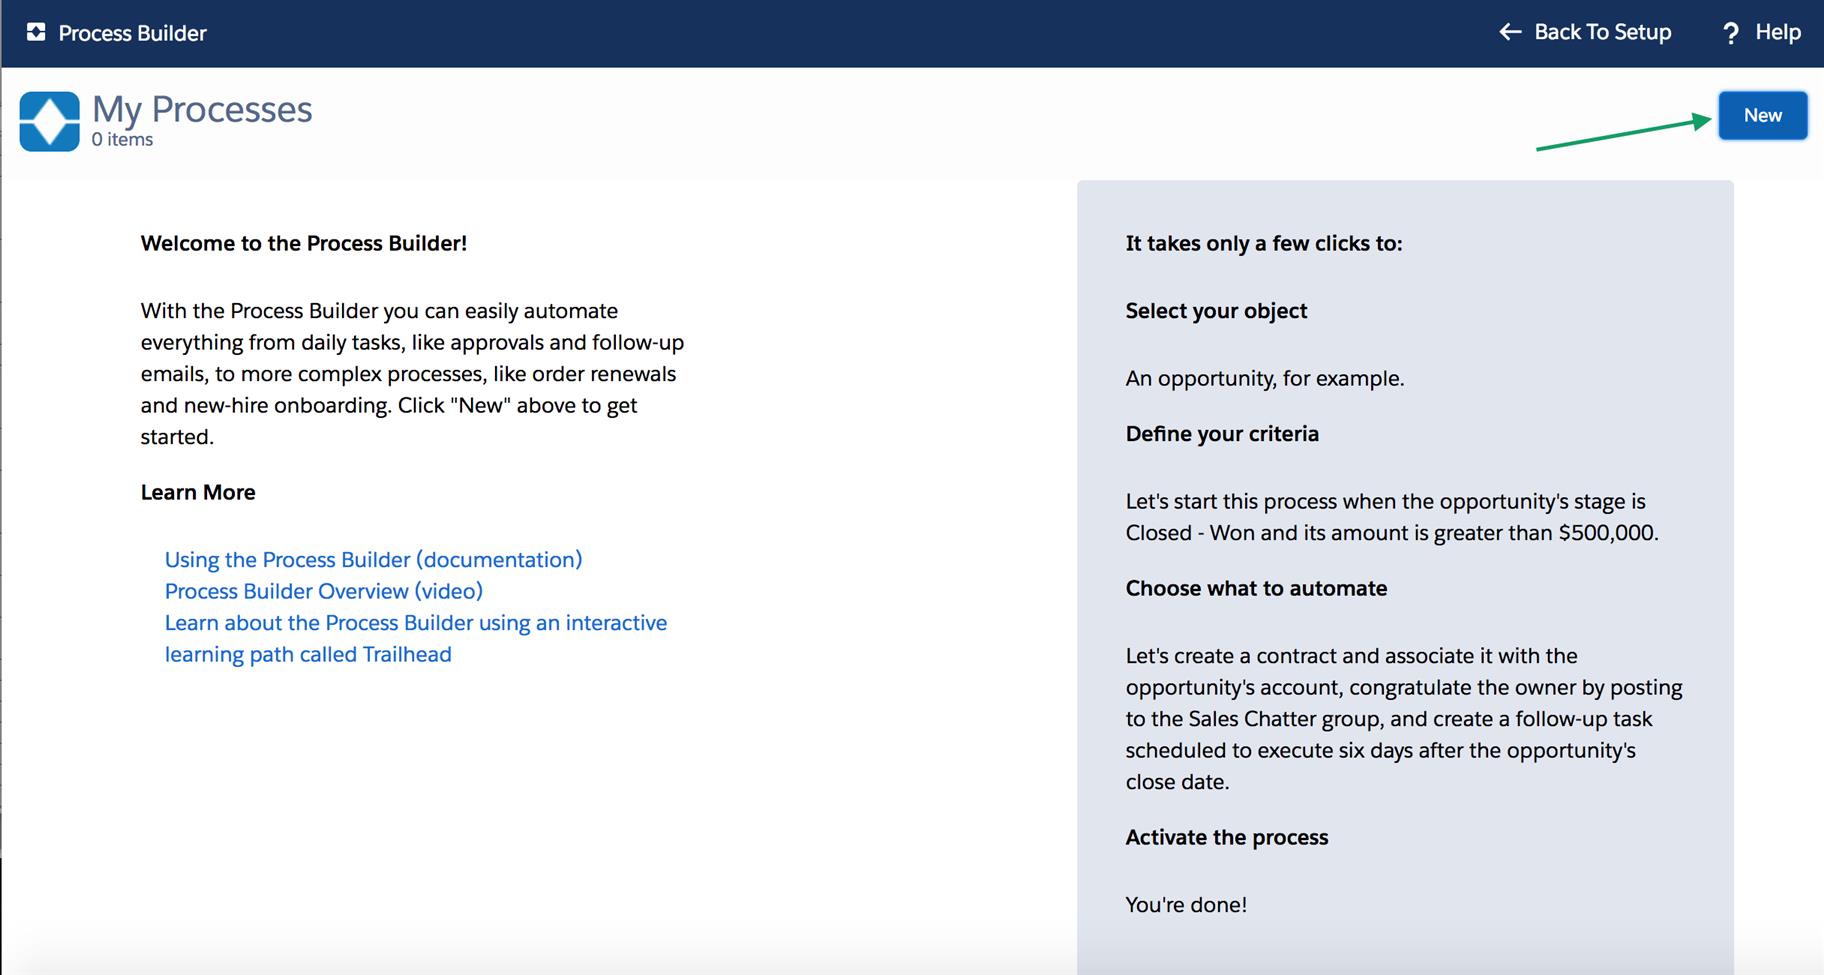
Click on button to create a <new> process.
Add a Process name as “Create Invoice on Opportunity – Stage”
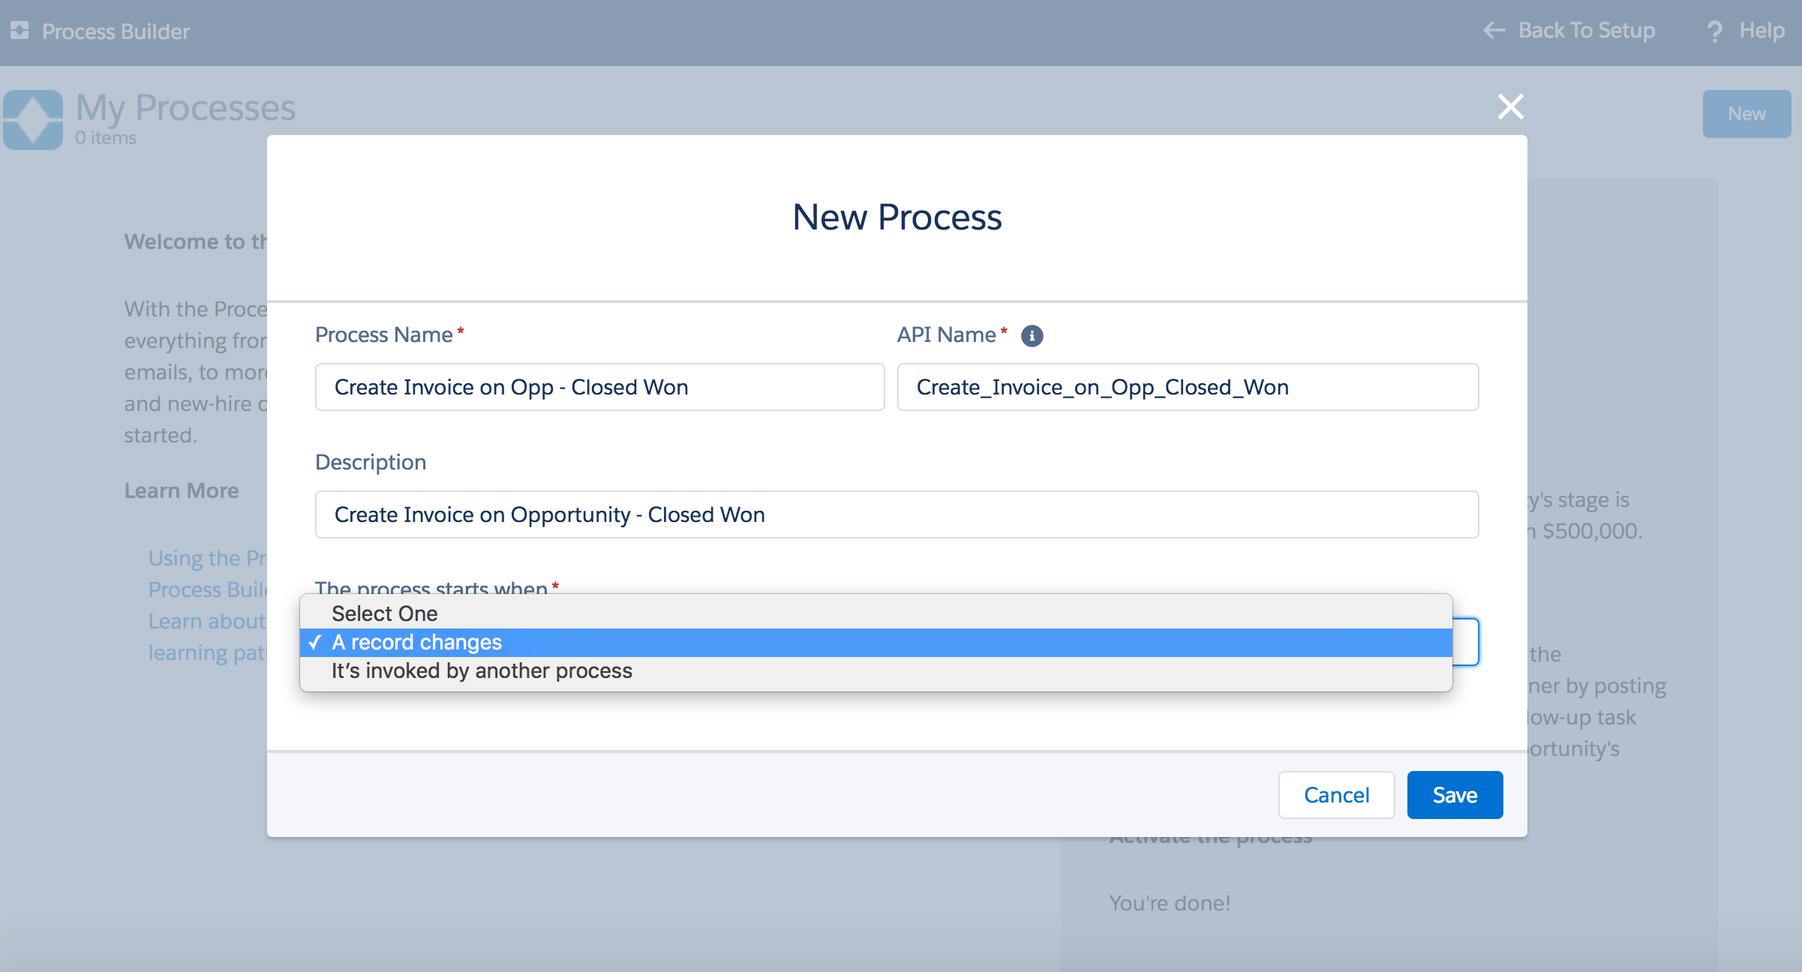
Select the Object, in this case “Opportunity “
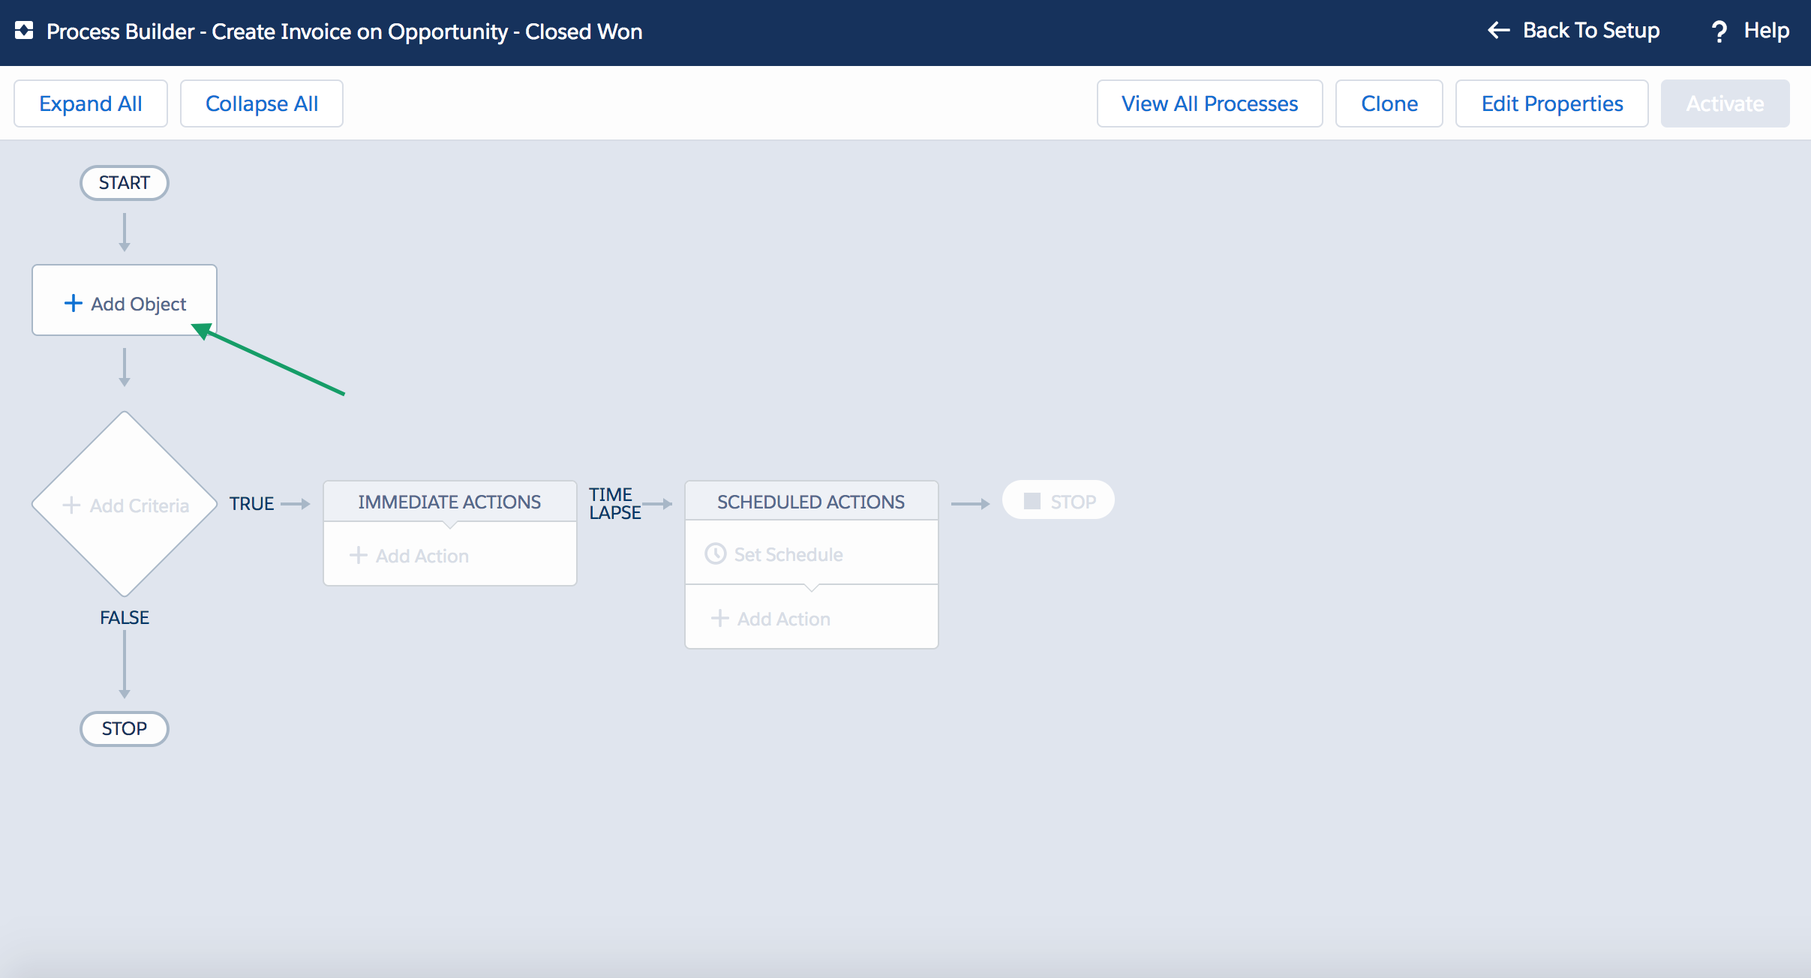

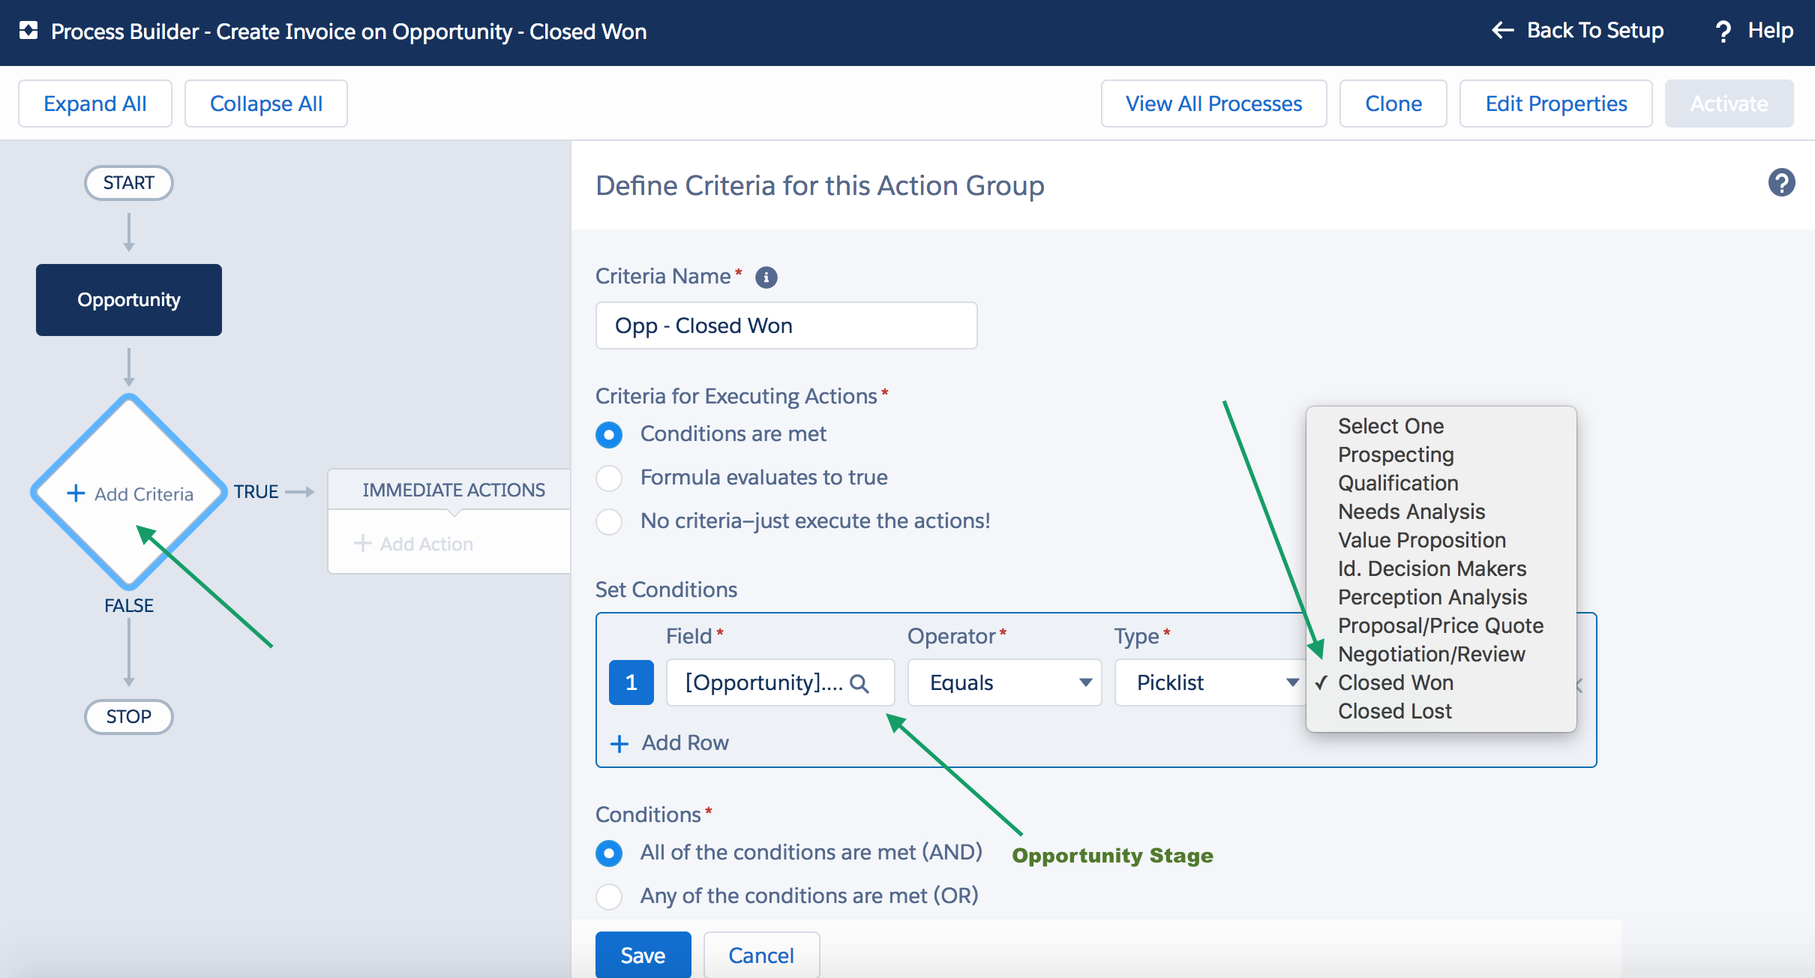
Add the Criteria as shown in the diagram below, in this case Opportunity Stage = “Closed Won”
Next add Action. For the action select “Apex”, provide a name and select the Apex class “SFX-AutoInvoice”
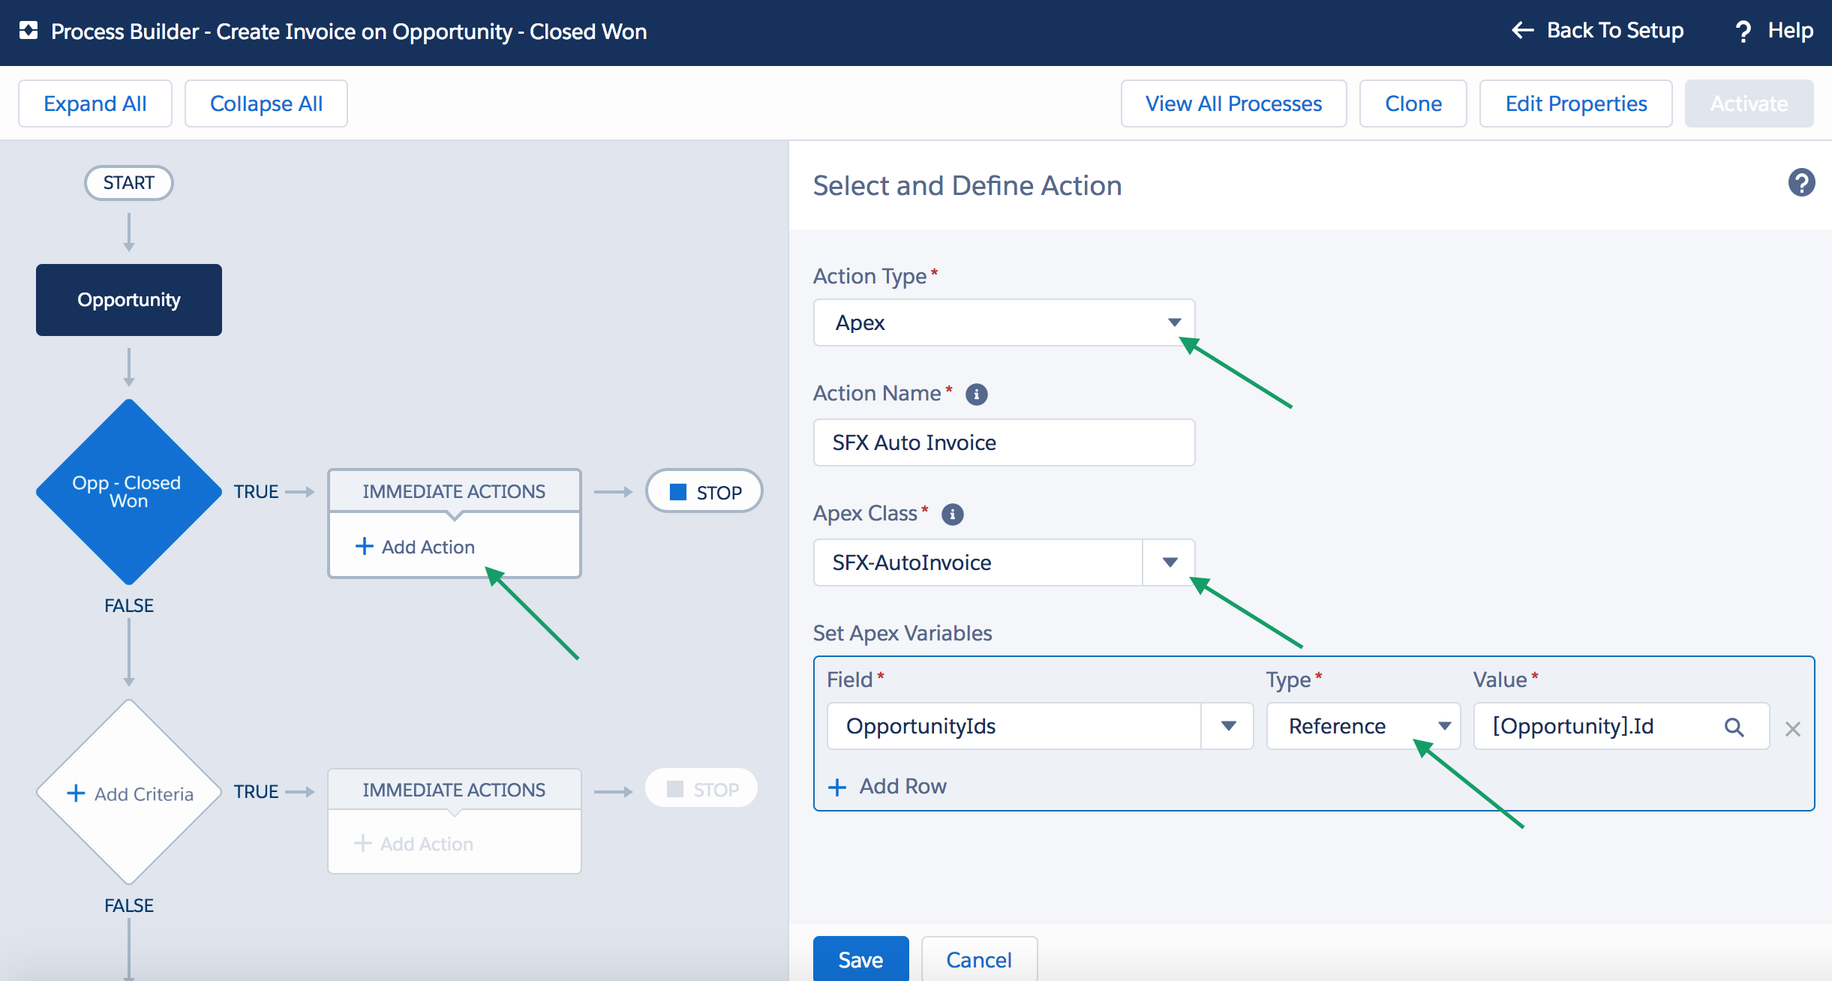
Followed by “Set Apex Variable”,
Select Field as OpportunityIds
Select Type as reference and
Select Value as Opportunity.ID
Save and Activate the Process builder.
Pre-requisite on Opportunity Create or Update:
Opportunity should be linked to Account
Opportunity should have line items with Xero Tax code values (Refer Index#13)
Opportunity contact role with primary contact
Opportunity should have “Xero Branding Theme” values updated
NOTE:
Editing of opportunity line items of an existing Invoice is based on editing the Opportunity
Any Invoice with Status as “Authorised” cannot be edited or modified via Process builder
Incase of an additional invoice existing on the opportunity object, the invoice with latest date/time stamp is updated via the Process builder upon editing and saving the Opportunity
